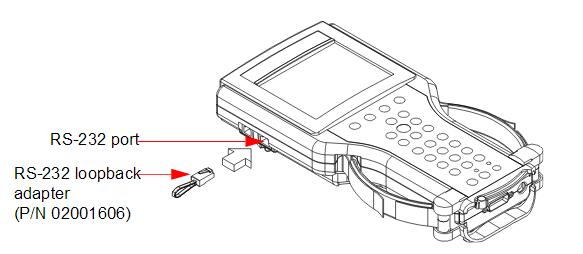
1. Remove the RS-232 loopback adapter (P/N 02001606) from the storage case (P/N 02002971). Plug it into the RS-232 port.
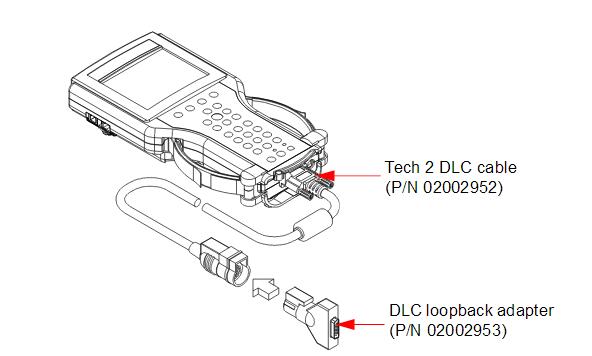
2. Attach the Tech 2 DLC cable (P/N 02002952) to the VCI connector.
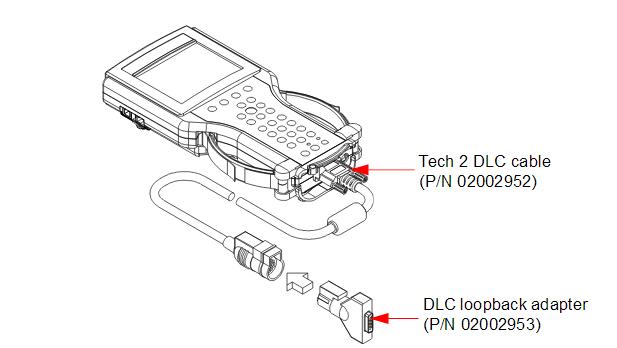
3. Locate the DLC loopback adapter (P/N 02002953) in the storage case. Attach it to the DLC cable.
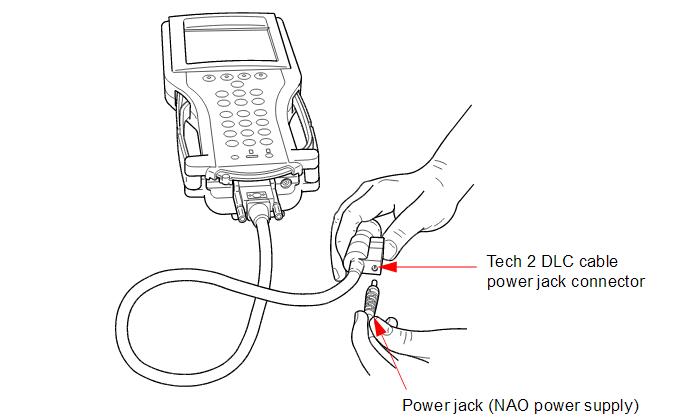
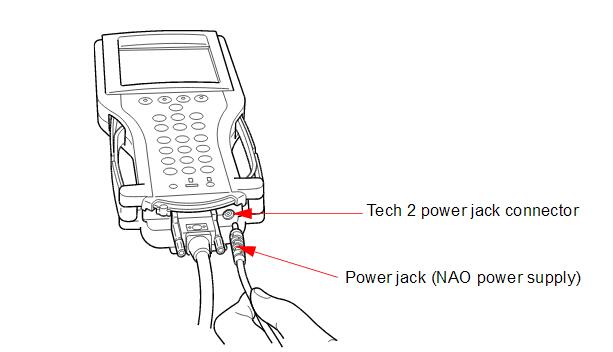
4. Locate the NAO (P/N 02002972) power supply and appropriate power cord in the storage case. Insert the power jack into the Tech 2 DLC cable or into the bottom of the Tech 2 next to DLC cable connector.
5. Turn on power by pressing the PWR button located on the GM Tech 2 key pad.
6. Car diagnostic scanner Tech 2 hardware is verified automatically by the POST Test.
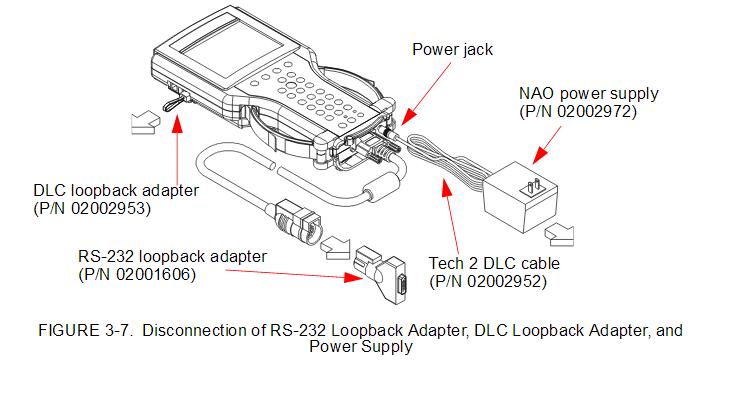
7. Disconnect the RS-232 loopback adapter, the power supply, and the DLC loopback adapter and return to the Tech 2 storage case.
