This section describes how to navigate the Diagnostics interface and select test options of Autel Maxisys Ultra.
Diagnostics Screen Layout
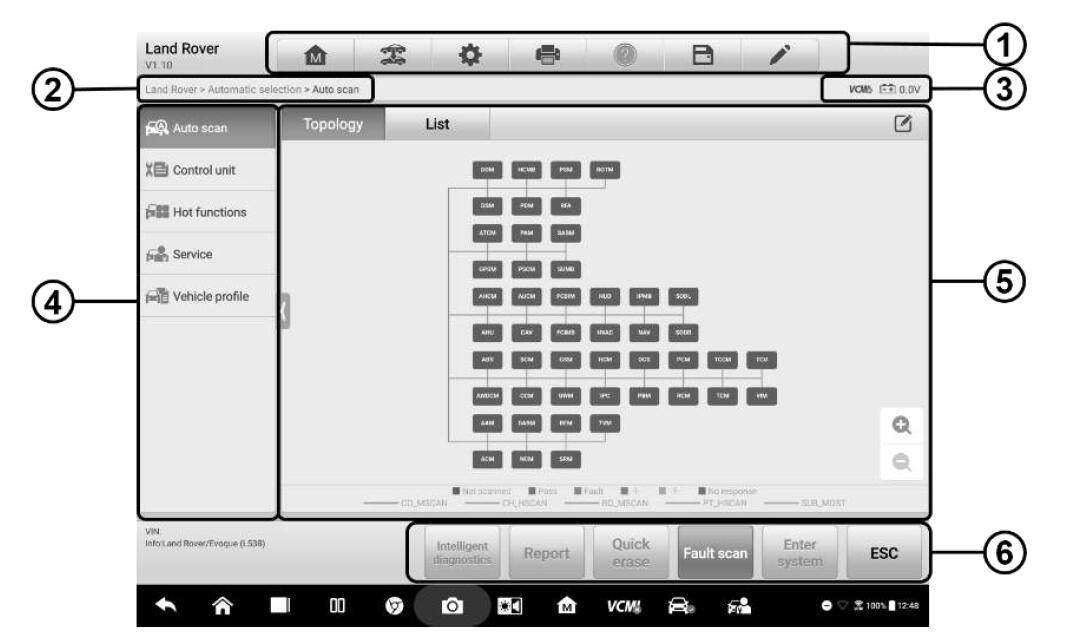
The Diagnostics screens typically includes six sections.

1. Diagnostics Toolbar
2. Current Directory Path
3. Status Information Bar
4. Navigation Bar
5. Main Section
6. Functional Buttons
1. Diagnostics Toolbar
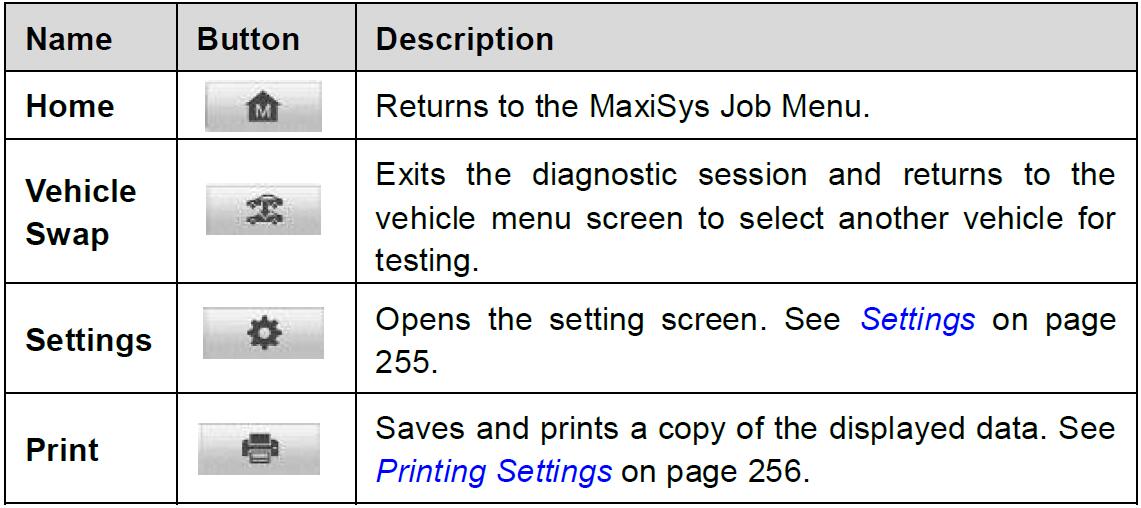
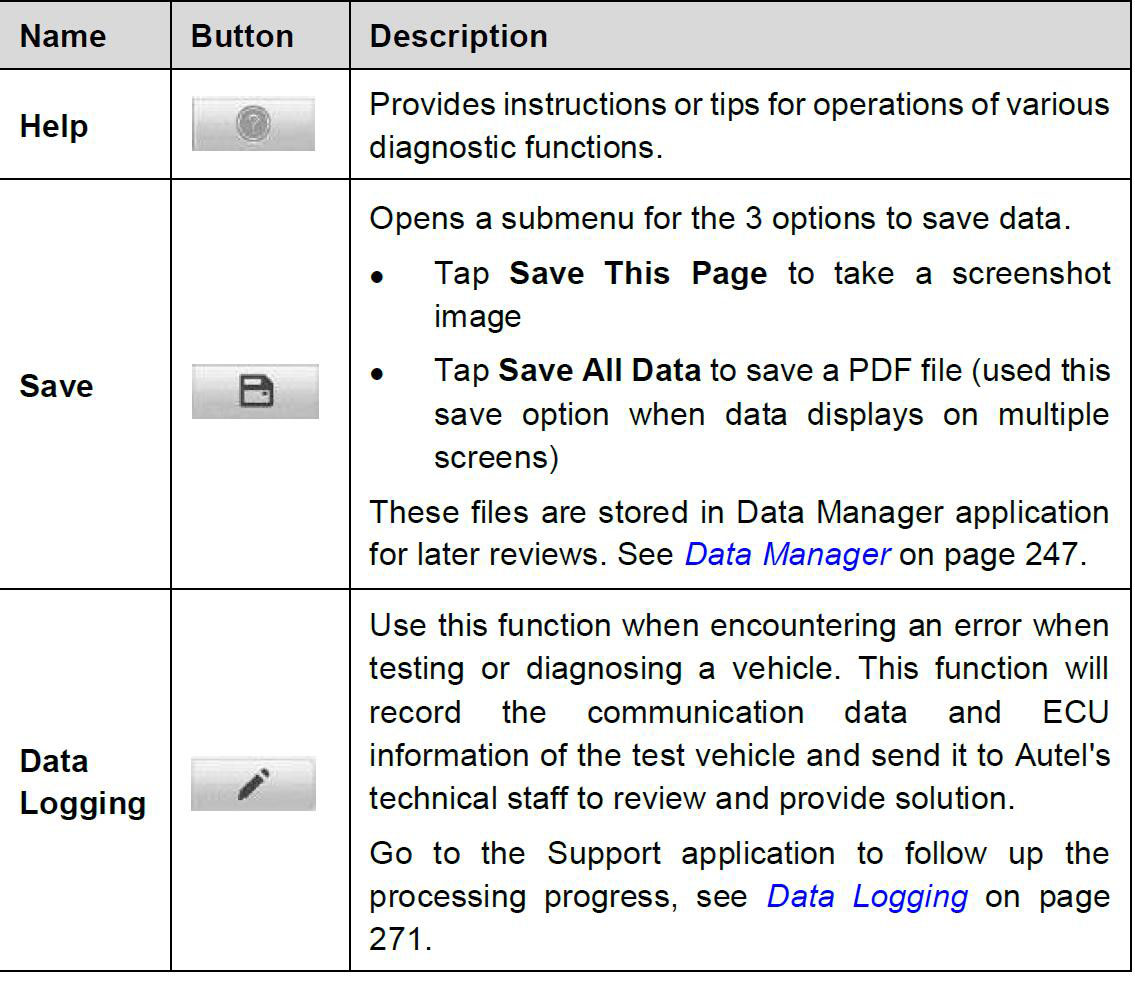
The Diagnostics Toolbar contains buttons that allow you to print or save the displayed data and perform other operations. The table below provides a brief description for the operations of the Diagnostics toolbar buttons:
To print data in Diagnostics
1. Tap the Diagnostics application button on the MaxiSys Job Menu. The Print button on the diagnostic toolbar is available throughout the Diagnostics operations.
2. Tap Print and a drop-down menu displays.
a) Print This Page – prints a screenshot copy of the current screen.
b) Print All Data – prints a PDF copy of all displayed data.
3. A temporary file will be created and sent via the computer to the printer.
4. When the file is sent, a confirmation message displays.
Current Directory Path
The Current Directory Path shows all directory names to access the current page.
Status Information Bar
The Status Information Bar at the top of the Main Section displays the following items:
1. VCMI Icon – indicates the communication status between the tablet and the VCMI device.
2. Battery Icon – indicates the battery status of the vehicle.
Navigation Bar
The Navigation Bar on the left side of the screen displays the main menu of the diagnostics functions. The main menu varies by the vehicle being tested. The common menu includes Auto Scan, Control Unit, Hot Function, Service, Vehicle Profile,Programming and more.
Main Section
The Main Section varies depending on the stage of operations which shows vehicle identification selections, the main menu, test data, messages, instructions and other diagnostic information.
Functional Buttons
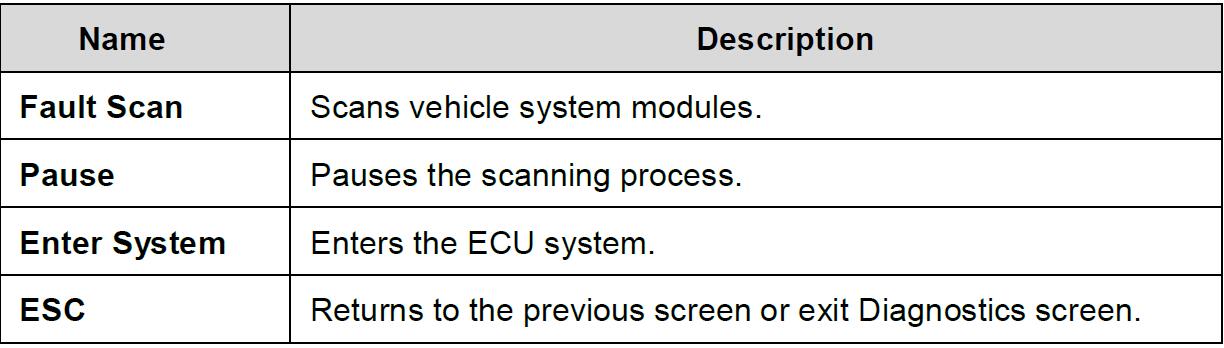
The type of Functional Buttons displayed at the bottom of the screen vary by operation. Function include navigation, reporting and code clearing. The functions of these buttons will be described in the following sections when relevant.
The table below provides a brief description of the Functional Buttons’ operations:
NOTE:
Make sure the tablet and the printer are connected either by Wi-Fi or LAN before printing.
For more instructions on printing, see Printing Settings on page 256 for details.

Select one of the system modules from the Topology or List, and tap Enter System to enter the specific system functions.
NOTE:
The Diagnostic Buttons Toolbar (located on the top of the screen) will be active throughout the diagnostic session for such tasks as printing and saving the displayed data, obtaining help information, or performing data logging.
2. Screen Messages
Messages display when additional input is needed before proceeding. There are mainly three main types of on-screen messages: Confirmation, Warning, and Error.
* Confirmation Messages
This type of messages usually displays as an “Information” screen, when you are about to perform an action that cannot be reversed or when an action has been initiated and your confirmation is needed to continue.
When a user-response is not required, the message displays briefly.
* Warning Messages
This type of messages displays when completing the selected action may result in an irreversible change or loss of data. An example of this message is the “Erase Codes” message.
* Error Messages
Error messages display when a systemic or procedural error has occurred. Possible errors include cable disconnection and communication interruption.
3. Making Selections
The Diagnostics application is a menu-driven program that presents a series of options one at a time. As you select from a menu, the next menu in the series displays. Each selection narrows the focus and leads to the desired test. Use your fingertip or the stylus pen to make menu selections.